
Blink Camera is a vital security device for your home. Its importance lies in its active monitoring and recording capabilities, ensuring the security essence of your premises.
When facing the issue of Blink Camera not recording, you can take simple troubleshooting steps. These steps are essential to maintaining the security system’s integrity.
The inability of your Blink Camera to record can impact your security rating. To address this problem, you must follow the troubleshooting steps to restore the camera’s recording functionality.
A reliable storage plan is crucial for maintaining a consistent recording history. The Blink system offers various storage plans to suit your needs.
Contents
Why Is My Blink Camera Not Recording?
When your Blink camera is not recording, several factors may contribute to this issue. It’s essential to check your network signal and device settings. If your camera is offline, it won’t capture clips.
Motion detection sensitivity level plays a role. Ensure it’s not set too low. Local storage or cloud storage is important for saving recordings. If your camera has insufficient storage, it won’t record.
The Sync Module 2 enhances recording with additional features. Consider a subscription for extra benefits.
If your camera is still not recording, check the power supply and battery. A disconnected camera or improper wiring can also be reasons.
Your camera might be in the disarmed state. Switch it to armed for active recording. Insufficient network signal can lead to poor recording.
During the trial period, explore the app and its alerts. Use two-way audio to interact. A curated article may provide solutions if your Blink camera is still not recording.
Live Recording Issue Reasons With Blink Camera
Live recording with a Blink camera is a valuable feature. It helps you monitor your property. However, performance issues like lag and buffering can lead to disconnections. These are common causes of frustration among users.
To resolve these live recording issues, it’s essential to address the root causes. Lag and buffering may occur due to slow internet connections. Checking your network speed can be a simple solution.
Disconnections can be due to interference or distance from the camera. Position your Blink camera strategically to ensure a stable connection.
By addressing these common causes, you can enjoy uninterrupted live recording with your Blink camera.
Slow Connection Speed
Slow connection speed can lead to live recording issues. An unstable internet connection affects the live feed, causing property monitoring problems.
Consider upgrading your internet plan for a faster provider. Don’t tolerate slow speeds; switch to a better option. Eliminate lag and buffering by making a change.
Camera Placement
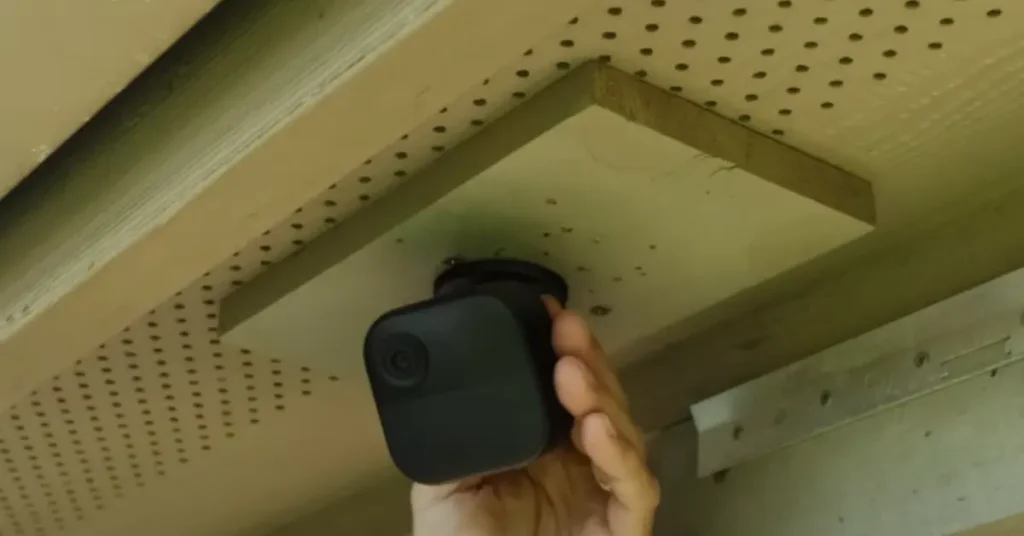
When it comes to “Camera Placement,” proper positioning is crucial for optimal performance. Ensure the camera is strategically located to avoid obstacles like furniture and walls.
For a reliable live recording feature, ensure a strong Wi-Fi connection by positioning the camera within the range of your Wi-Fi router. This minimizes connectivity issues and guarantees a smooth live feed.
Avoid placing the camera where it may encounter obstacles or interference. Optimal camera placement ensures you won’t face poor live feed issues, enhancing the camera’s overall performance.
Wi-Fi Interference
Wi-Fi interference can be caused by electronic devices and appliances in your home. These devices emit signals on the same frequency as your Wi-Fi router, which can affect the live recording feature of your Blink camera.
To avoid interference, consider the placement of these devices, as their proximity to your camera can lead to poor signal quality in the live feed.
The changing frequency of these devices is a significant factor in interference, and it can disrupt the camera’s ability to maintain a stable live feed.
To ensure the best performance, it’s essential to be mindful of the placement of electronic devices and appliances in your home, especially when it comes to their proximity to your Blink camera and its live recording feature.
Firmware Updates
Firmware updates are crucial for your camera’s optimal performance. Outdated firmware often leads to glitches and bugs in the system.
To ensure your camera’s ability to stream live footage flawlessly, always check for available firmware updates.
These updates not only enhance performance but also introduce new features like the live recording feature.
Regularly install firmware updates to maintain a smooth and bug-free camera experience.
Low Battery Life
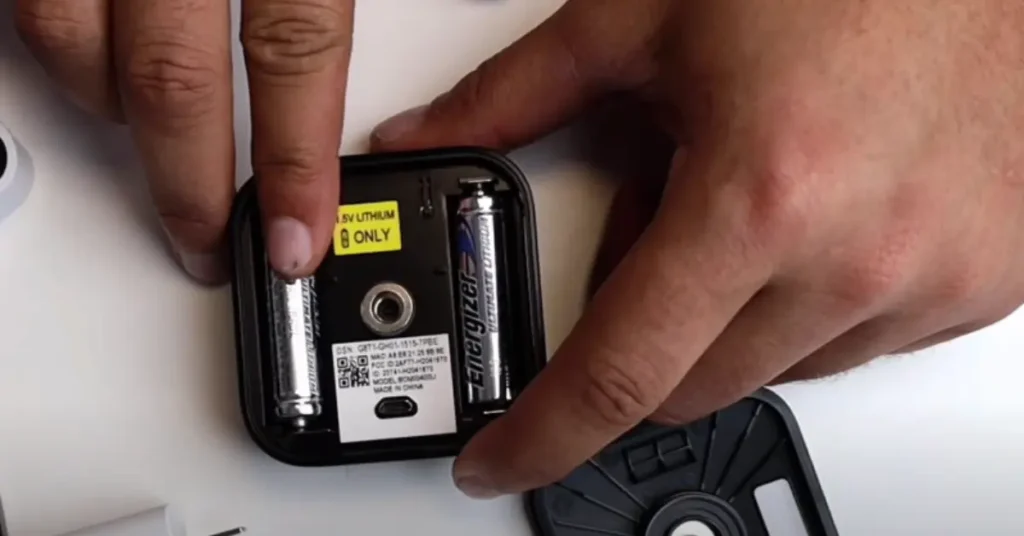
Low battery life can cause live recording issues on your camera. The camera’s battery affects live streaming and may lead to poor live feed.
Make sure your camera is charged for optimal performance. Consider purchasing additional batteries for extended usage. Low battery life is a common concern when using a camera.
Fixing Blink Camera Not Recording
When your Blink Camera isn’t recording, it can be heart-wrecking. Troubleshooting is key. Ensure your setup is on point. Check for network issues. Confirm playback options.
If your smart camera is missing recordings, don’t despair. Troubleshooting solutions can fix it. Complaining won’t help, but taking action will.
Your Blink Camera is like a tire-less car, always monitoring. Make sure it records as it should. Troubleshoot for any jamming. Playback your recordings with ease.
Confirm Your Camera Is Online
When ensuring your Blink camera is online, utilize the Blink app for a seamless experience. Connect to Wi-Fi and sync the module for efficiency. Watch for GREEN and BLUE LED lights indicating network status.
To guarantee a stable connection, check your network router and signal strength. In case of poor signal, we recommend power cycling to boost connectivity. Confirm motion events are sent to cloud servers for your peace of mind.
Online, sync, and cloud connection are vital for Blink cameras. Wi-Fi and network reliability play a crucial role. Verify everything in order to enjoy uninterrupted monitoring.
For a robust camera system, ensure proper synchronization with the sync module. GREEN and BLUE LED lights signify network status. Regularly check for online status and connection to cloud servers.
When it comes to signal strength, we recommend confirming a strong Wi-Fi network. In case of poor connectivity, perform power cycling to refresh and reinitialize your system. Keep your Blink camera online for optimal performance.
Double-Check Your Camera Settings
When setting up your camera system, always double-check your camera settings.
- On the home screen, find the camera settings page.
- Here, you can fine-tune the security features, like motion detection.
- Use the toggle buttons to switch between armed and disarmed modes.
- This controls the monitoring of motion and events.
- Be sure to confirm your choices to ensure your camera is set up correctly.
In the camera settings, you can adjust motion sensitivity using the sensitivity bar. This helps customize motion recording. You can also define private zones to avoid unnecessary notifications.
For better night vision and video quality, explore the outdoor cam’s settings. Check the field of view to ensure the entire area of focus is covered.
This complete guide ensures your blink camera is optimized for its functionality. Don’t overlook these essential features for reliable security.
What’s Your Storage Option?
When considering your storage options for the Blink security system, you have a few choices to ensure you never miss a moment.
- Local Storage: Utilize the Blink app to store motion clips on your PC or thumb drive, a simple and viable option for those low on storage.
- Cloud Storage: opt for a Blink subscription plan to access secure cloud storage and take advantage of the free trial period to evaluate its suitability.
- Active Storage Plan: Ensure motion alerts are never missed by combining an active storage plan with your Blink cameras.
- Sync Module 2: For added capacity and system status, consider the Sync Module 2, which offers both local and cloud storage options.
- Backup: To prevent data loss, make it a habit to back up your important clips, and if necessary, safely eject your thumb drive.
- Mass Delete: When you find yourself low on storage, don’t forget to free up space by mass deleting old clips.
- Live View: Access your cameras in real-time through the app and monitor your surroundings effortlessly.
Remove And Reconnect the Sync Module
When dealing with the Sync Module in your Blink Camera system, it’s crucial to understand its functionality and how to troubleshoot any issues.
The Sync Module is the hub of your camera system, responsible for connecting your cameras to the Blink app and the cloud servers. Its serial number is essential for ownership verification.
To address recording issues, ensure that your Sync Module is well-connected to your Wi-Fi network.
If you face problems with live view or motion detection, a simple refresh of your network connection might do the trick. Delete any problematic cameras and reconfigure them to the system.
If issues persist, consider performing a factory reset on the Sync Module. This will return it to its initial setup installation afresh, potentially resolving the problem.
Remember, communication between your cameras and the Sync Module is key to efficient recording.
To free up storage space, you can also remove attached storage or finalize the setup installation. These steps can help optimize your Blink Camera system and ensure smooth recording.
How Do I Get My Blink Camera to Record Motion?
When dealing with your Blink Camera’s motion detection and recording, it’s crucial to ensure your system is functioning correctly.
Start by checking the camera settings in the Blink app. Look for the sensitivity level and activity zones to customize them according to your preferences.
To enable motion recording, click on the running man icon in the camera settings. It should turn solid blue, indicating that the motion detection is now active. If it’s green, it means it’s disabled.
Additionally, make sure your camera is online and in sync with the Blink cloud servers. The status lights, usually blue and green, will confirm their connection. If not, check your internet connection and the Sync module.
Conclusion
In the world of home security, Blink Camera has emerged as an affordable and user-friendly choice for homeowners. Its live recording feature and optimal camera placement ensure a secure environment.
However, homeowners may face connectivity issues due to obstacles or electronic devices interfering with the Wi-Fi router signals. Firmware updates are essential for resolving glitches and bugs, ensuring the camera’s optimal performance.
When these hurdles are overcome, Blink Camera delivers a reliable live feed, streaming footage from a battery-charged device. In conclusion, it’s a practical choice for enhancing home security.
FAQs
Is there a monthly fee for Blink cameras?
Blink cameras offer various features, including cloud storage. The Basic Plan has a monthly fee for added benefits.
Subscribing for a year comes with a discounted rate. Unfortunately, security vulnerabilities can potentially allow unauthorized access.
If you want advanced features, you can subscribe for added security. Blink cameras have you covered if you want to protect your device.
Can Blink cameras be hacked?
Blink cameras can potentially be hacked due to security vulnerabilities. Unauthorized access may lead to spying and snooping on your data and footage.
To prevent this, make sure to regularly update the camera’s firmware and use strong passwords. Taking necessary precautions is essential in preventing theft.
What is the range of the Blink camera?
The Blink camera has a motion detection range of up to 20 feet, ensuring it can effectively detect motion. Proper camera placement and good lighting enhance its performance.
Do Blink cameras click when recording?
Blink cameras automatically turn on when recording in both daylight and night. They click softly, thanks to their IR technology. At night, the IR feature ensures clear recordings without disturbing your surroundings.
You can manually turn off the click sound if it bothers you. Whether it’s recording during the day or night, Blink cameras are designed to capture moments without interruption.